Extract XML

Create a new segmentation based on XML markup.
Signals
Inputs:
SegmentationSegmentation covering XML data based on which a new segmentation will be created
Outputs:
Extracted dataSegmentation containing the segments corresponding to extracted XML elements
Description
This widget inputs a segmentation, searches in its content portions corresponding to a specific XML element type, and creates a segment for each occurrence of this element. It should be noted that if a given occurrence is distributed among several segments of the input segmentation, it will result in the creation of as many segments in the output segmentation.
Every attribute from extracted elements is automatically converted in annotation in the output segmentation. For example, extracting the element <div> in the following fragment:
<div type="interjection">Cripes!</div>
will result in the creation of a segment whose content is Cripes! and whose annotation value for key type is interjection.
This widget offers the easiest and most flexible way to import into Orange Textable a segmentation and arbitrary annotations specified by the user for a given text. Let us however mention the following limitation: the widget automatically deletes all segments of zero length in the output segmentation. As a consequence, it is impossible to import empty XML elements (be they in the form <element></element> or <element/>).
Basic interface
In the basic widget interface (see figure 1 below), the XML Extraction section allows the user to specify the XML element to extract (XML element). The widget indeed only allows the extraction of a single type of element at a time; however, it extracts every occurrence of this element, including those embedded in other occurrences of the same type.
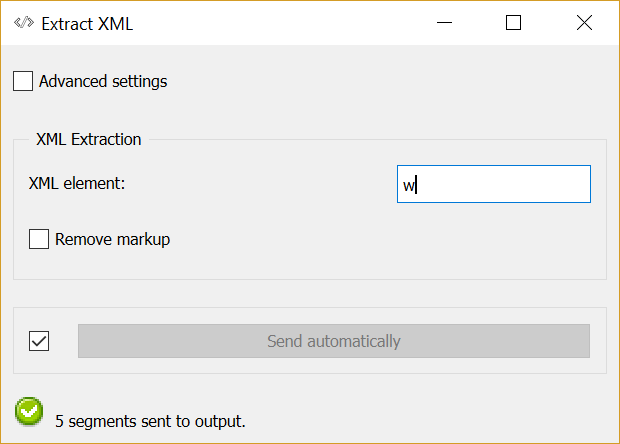
Figure 1: Extract XML widget (basic interface).
The Remove markup checkbox triggers the deletion of XML tags embedded within the extracted XML elements, if any. An important consequence of the use of this option is that the extracted elements will potentially be decomposed in several segments corresponding to portions of their content which are separated by the deleted XML tags (see Advanced interface for an example of this mechanism [1]).
The Send button triggers the emission of a segmentation to the output connection(s). When it is selected, the Send automatically checkbox disables the button and the widget attempts to automatically emit a segmentation at every modification of its interface or when its input data are modified (by deletion or addition of a connection, or because modified data is received through an existing connection).
The Cancel button interrupts the current process and therefore returns the widget to its precedent state.
Below, the Send button, the user finds indications such as the number of segments in the output segmentation, or the reasons why no segmentation is emitted (no input data, no output segment created, etc.).
Advanced interface
The XML Extraction section of the widget interface (see figure 2 below) allows the user to configure the XML element extraction. The field XML element allows the user to indicate the XML element type which should be sought. The Import element with key checkbox enables the program to assign to each output segment an annotation whose key is the text contained in the field immediately on the right and whose value is the name of the XML element extracted by the widget.
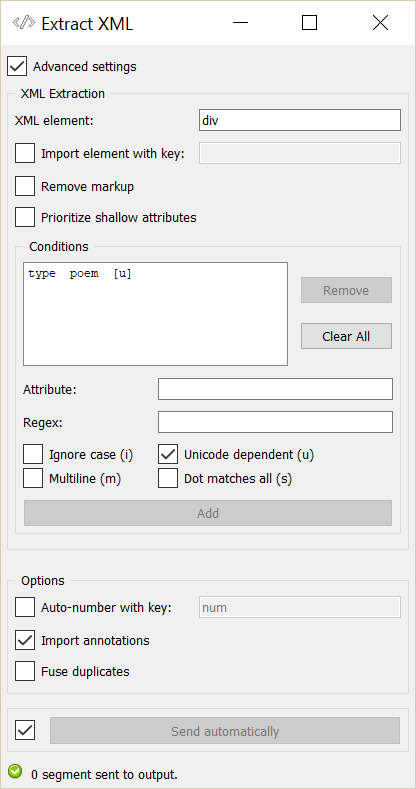
Figure 2: Extract XML widget (advanced interface).
If the Remove markup checkbox is selected, XML tags embedded within the extracted XML elements will be excluded from the output segmentation. An important consequence of the use of this option is that the extracted elements will potentially be decomposed in several segments corresponding to portions of their content which are separated by the excluded XML tags. For example, given the following fragment:
<text>a <keyword>fragment</keyword> of XML data</text>
the extraction of element <text> will lead to the creation of three segments:
a
fragment
of XML data
If on the other hand the Remove markup option is not selected, a single segment will be created:
a <keyword>fragment</keyword> of XML data
The Prioritize shallow attributes checkbox determines the behavior of the widget in the very particular case where (a) elements of the extracted type are (exactly) embedded in one another, (b) they have different values for the same attribute, (c) the Remove markup option is selected and (d) the Fuse duplicates option (section Options) as well. This could be the case in the extraction of the <div> element in the following fragment for example:
<div type="A"><div type="B">two exactly embedded elements</div></div>
In such a case, the widget will first create two segments that have the exact same address (since the embedded XML tags are deleted with Remove markup), then by the effect of Fuse duplicates, it will seek to fuse them into one. It will only be able to keep one of the rival annotation values A and B for the annotation key type; by default, it will be the value associated to the element closest to the root in the XML tree, namely A. If on the other hand the Prioritize shallow attributes option is selected, the value of the element closest to the “surface” will be kept, in our example B.
The Conditions subsection included in the XML Extraction section allows the user to limit the extraction by specifying conditions bearing on attributes of the extracted elements. These conditions are expressed in the form of regular expressions that the given attribute values must match. In the list appearing at the top of this subsection, the columns indicate (a) the concerned attribute, (b) the corresponding regular expression, and (c) the options associated to this expression. [2]
In figure 2 above, we have thus limited the extraction only to the <div> elements that have a type attribute whose value is poem. If several conditions were defined, they would all have to be fulfilled for an element to be extracted. The buttons on the right enable the user to delete the selected condition (Remove) or to empty the list completely (Clear All).
The remaining part of the Conditions subsection allows the user to add new conditions to the list. To do so, the attribute in question (Attribute) and the corresponding regular expression (Regex) must be specified. The Ignore case (i), Unicode dependent (u), Multiline (m) and Dot matches all (s) checkboxes manage the application of the corresponding options to the regular expression. Adding the new condition to the list is finally carried out by clicking on the Add button.
Through the Options section the Auto-number with key checkbox enables the program to automatically number the segments of the output segmentation and to associate the number to the annotation key specified in the text field on the right. The Import annotations checkbox copies in each output segment every annotation associated to the corresponding segment of the input segmentation. The Fuse duplicates checkbox enables the program to fuse distinct segments whose addresses are the same in a single segment; the annotations associated to the fused segments are copied in the single resulting segment. [3]
The Send button triggers the emission of a segmentation to the output connection(s). When it is selected, the Send automatically checkbox disables the button and the widget attempts to automatically emit a segmentation at every modification of its interface or when its input data are modified (by deletion or addition of a connection, or because modified data is received through an existing connection).
The Cancel button interrupts the current process and therefore returns the widget to its precedent state.
Below the Send button, the user finds some indications such as the number of segments in the output segmentation, or the reasons why no segmentation is emitted (no input data, no output segment created, etc.).
Messages
Information
- <n> segments sent to output.
This confirms that the widget has operated properly.
Warnings
- Widget needs input.
The widget instance is not able to emit data to output because it receives none on its input channel(s).
- Settings were (or Input has) changed, please click ‘Send’ when ready.
Settings and/or input have changed but the Send automatically checkbox has not been selected, so the user is prompted to click the Send button (or equivalently check the box) in order for computation and data emission to proceed.
- Please type an XML element.
The name of an XML element must be entered in the XML element field in order for computation and data emission to proceed.
- Please enter an annotation key for auto-numbering.
The Auto-number with key checkbox has been selected and an annotation key must be specified in the text field on the right in order for computation and data emission to proceed.
- Please enter an annotation key for element import.
In the advanced settings, the Import element with key checkbox has been selected and an annotation key must be specified in the text field on the right in order for computation and data emission to proceed.
- Operation cancelled by user.
The user has cancelled the operation.
Errors
- Please enter a valid regex (<error_message>, condition #<n>).
The regular expression in the n-th line of the Conditions list is invalid.
- Please make sure that input is well-formed XML.
The input XML data couldn’t be correctly parsed. Please use an XML validator to check the data’s well-formedness.